FFmpeg is indeed a powerful video encoder/decoder tool¹. It operates in the command line, as opposed to using a GUI. Command line is that black window you find by clicking [windows+r] and typing cmd then hitting enter. This is also called "command prompt". Once setup you enter ffmpeg commands in one of these windows to use it.
Here are the basic steps to "install" and use it:
Installation
- Go to the ffmpeg download site and download the zip file that best fits your computer's specs. Choose the "static" linking and the "nightly git" version for the most current usability.
- Create a folder on your computer to unpack the zip file. This folder will be your "installation" folder. I chose
C:\ffmpeg\. This is a good idea because you will treat this like a regular program. Unpack the zip file into this folder. - The folder should now contain a number of other folders, including one titled
binwhereffmpeg.exeis saved. We're not done yet. Double clicking that file does nothing. Remember, this is a command line program. It runs incmd. - Before you can use
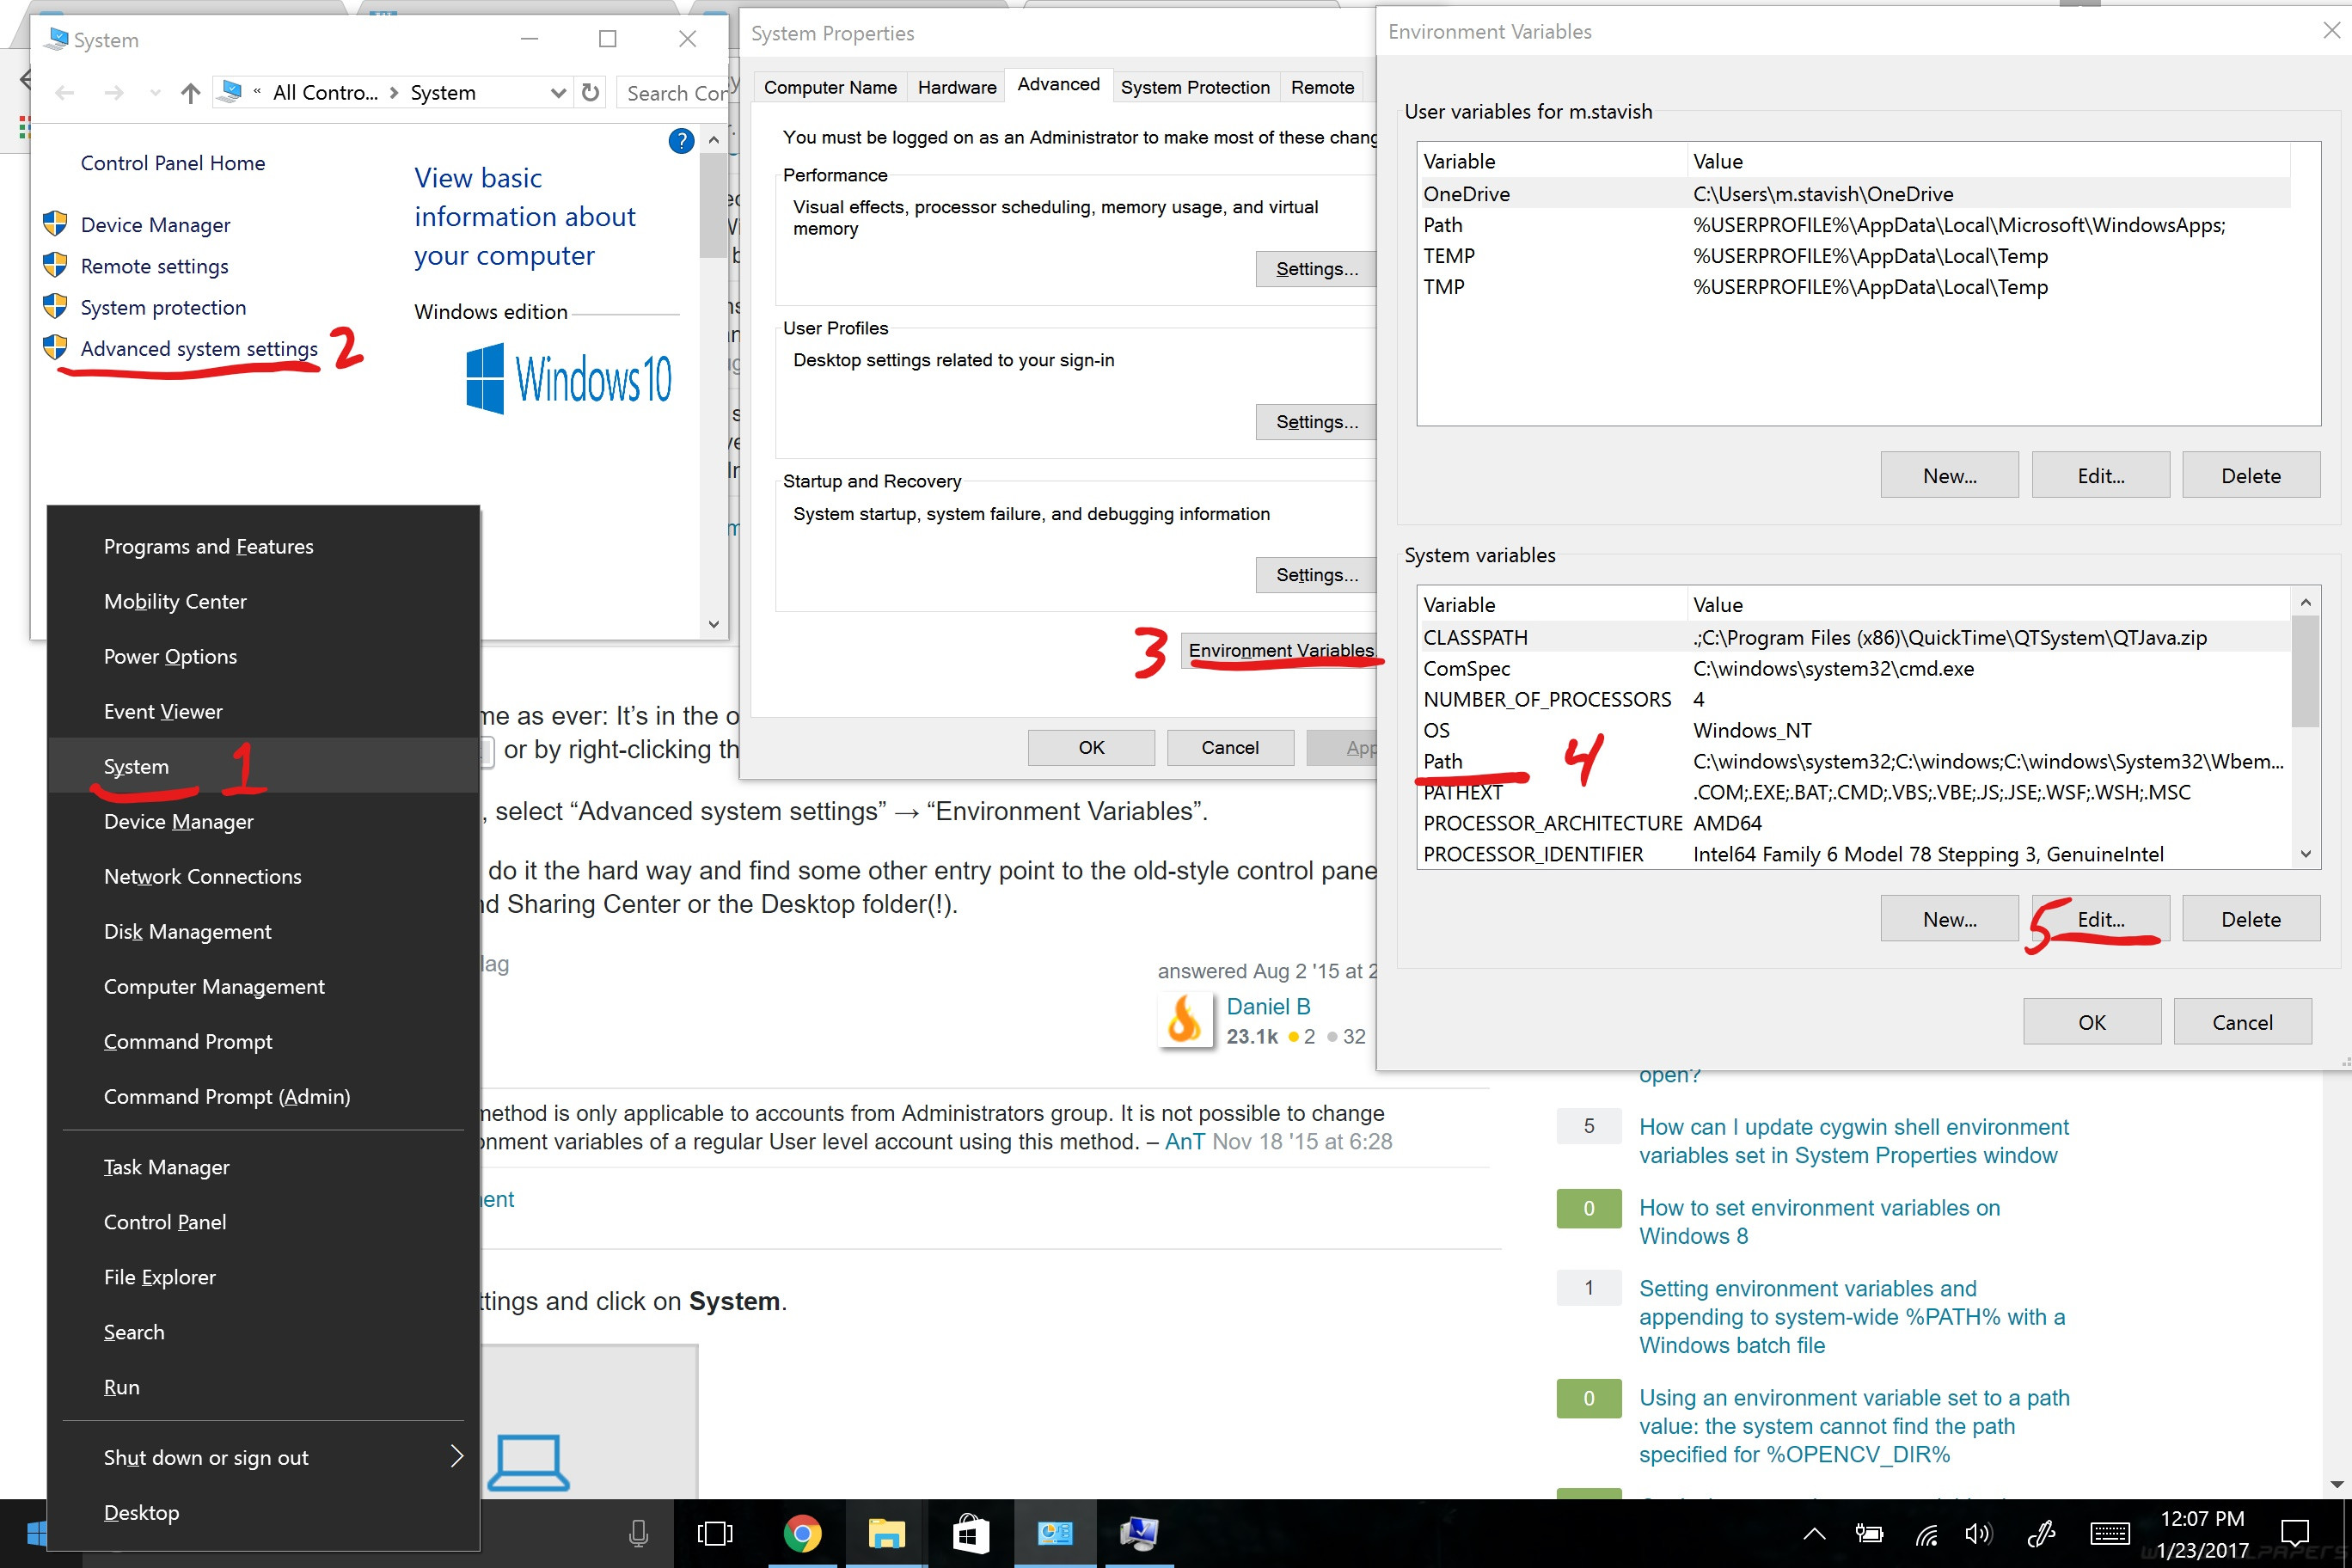
ffmpeg.exeincmdyou have to tell your computer where it can find it. You need to add a new system path. First, right click This PC (Windows 10) or Computer (Windows 7) then clickProperties > Advanced System Settings > Advanced tab > Environment Variables. - In the Environment Variables window, click the "Path" row under the "Variable" column, then click Edit.

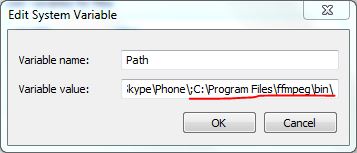
6. The "Edit environment variable" window looks different for Windows 10 and 7. In Windows 10 click New then paste the path to the folder that you created earlier where ffmpeg.exe is saved. For this example, that is C:\Program Files\ffmpeg\bin\ Add new system path Windows 10]3 In Windows 7 all the variables are listed in a single string, separated by a semicolon. Simply go to the end of the string, type a semicolon (;), then paste in the path.

7. Click Ok on all the windows we just opened up.
ffmpeg is now "installed". The Command Prompt will now recognize ffmpeg commands and will attempt to run them. (If you are still having issues with Command Prompt not recognizing ffmpeg try running CMD as an admin. Alternatively, you can use windows powershell instead of cmd. If it still does not work double check to make sure each step was followed to completion.)
Updating ffmpeg
To update ffmpeg, just revisit the download page in step 1 above and download the zip file. Unpack the files and copy them over the old files in the folder you created in step 2.
Using ffmpeg
Using ffmpeg requires that you open a command prompt window, then type ffmpeg specific commands. Here is a typical ffmpeg command:
ffmpeg -i video.mp4 -vn -ar 44100 -ac 1 -b:a 32k -f mp3 audio.mp3
This command has four parts:
ffmpeg- This command tells cmd that we want to run ffmpeg commands. cmd will first look forffmpeg.exein one of the folders from step 6 in the Installation section. If it is found, it will attempt to run the command.-i video.mp4- This is an input file. We are going to be doing work on this file.-vn -ar 44100 -ac 1 -b:a 32k -f mp3- These are the "arguments". These characters are like mini commands that specify exactly what we want to do. In this case, it is saying create an mp3 file from the input source.
-vn- Leave out the video stream-ar 44100- Specifies audio resolution in hertz.-ac 1- Audio channels, only 1. This is effectively "make mono".-b:a 32k- Audio bitrate, set to 32 kbps.-f mp3- Force to MP3 conversion. Without this command, ffmpeg attempts to interpret what you want based on the extension you use in the output file name.
audio.mp3- This is the output file.
As you can probably guess, this short command makes an MP3 audio file from an MP4 file.
To run this command, assuming you have an MP4 file to try this on, follow these steps:
- Hit the Windows key + r.
- Type
cmdthen enter. - Change the path to where the file is that you want to work on. Type
cd [path]. It should look something likecd C:\Users\name\Desktop\. - Now type the ffmpeg command with the name of your input file. The command will run with some feedback. When it's done, cmd will be available for more commands.
This is the basic way to use ffmpeg. The commands can get far more complicated, but that's only because the program has so much power. Using the ffmpeg documentation, you can learn all the commands and create some very powerful scripts. After that, you can save these scripts into a .bat file so that you just have to double click a file instead of type out the whole command each time. For example, this answer contains a script that will create MP3's from all the MP4's in a folder . Then we would be combining the power of ffmpeg with the power of cmd, and that's a nice place to be when you have to do professional quality video/audio encoding on mountains of files.
- As a point if technical accuracy, ffmpeg is itself not an encoder or decoder. It is a program that can be compiled with a large variety of encoders, decoders, muxers, and demuxers, based on user preference. All of these encoders etc, can be used without ffmpeg.
